One Dockerfile for Dev & Production? Yes, and Here’s Why
- September 16, 2025
- Software platform
Want to simplify your Docker setup and keep dev and production perfectly aligned?
Here’s how I use Docker multi-stage builds and VS Code Dev Containers to maintain a single source of truth—and eliminate the pain of maintaining multiple Dockerfiles.
I used to have two Dockerfiles for my projects.
One was for my devcontainer, and it was packed with everything a developer needs: linters, debuggers, and testing frameworks.
The other was a lean Dockerfile for the final production build, stripped down to the bare essentials.
To make my dev and production environments as close as possible, I wanted my dev container’s base image to be identical to my production build environment.
Every time I added a new dependency or changed a build step, I had to update both files. It was tedious, prone to errors, and honestly, a frustrating duplication of effort. There had to be a better way.
And there is.
The solution? Docker multi-stage builds and the powerful --target option.
The Problem with Duplication
The biggest headache with separate Dockerfiles is the risk of environment drift.
If your dev container isn’t based on the same foundational image as your production build environment, you could introduce subtle bugs that only appear in production.
You want a single source of truth—one file that defines your application’s environment from development to deployment. And using Docker multi-stage builds lets you avoid this problem entirely.
How a Single File Works
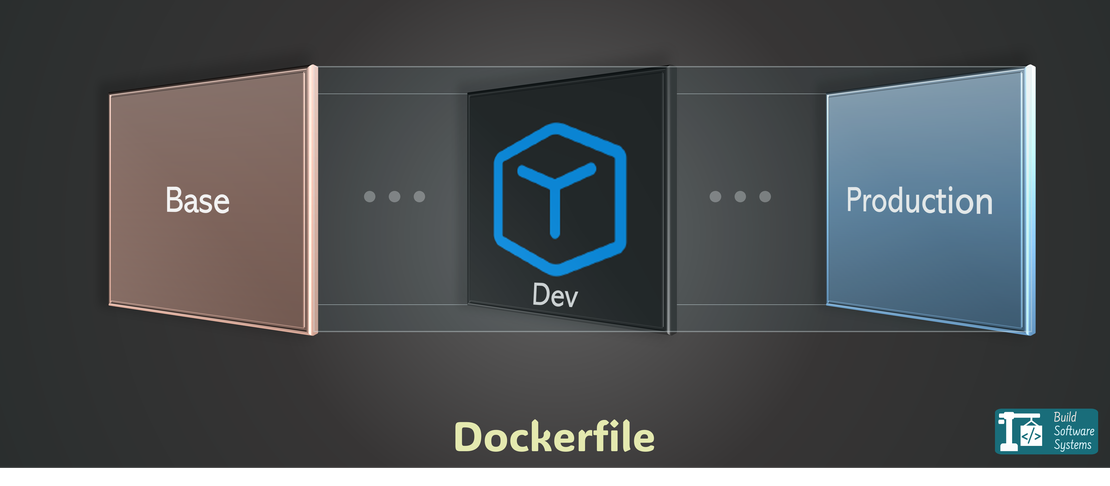
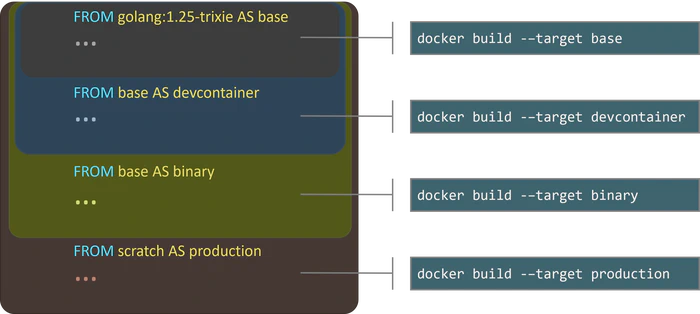
The trick is to use a single Dockerfile with multiple named stages.
You can define a heavyweight development stage (devcontainer) that includes all your extra tools, and a separate, minimal production stage (production) for the final, deployable image.
The docker build --target flag then tells Docker exactly which stage to build.
With a single Dockerfile using named stages, your setup becomes cleaner, easier to maintain, and less error-prone. Here’s what that structure looks like:
 1# Stage 1: The Base Environment (all dev and build dependencies)
 2FROM golang:1.25-trixie AS base
 3
 4# ... core setup like copying go.mod and go.sum ...
 5
 6# Stage 2: The Devcontainer Stage
 7FROM base AS devcontainer
 8
 9# ... install dev tools and run a dev-friendly command ...
10
11# Stage 3: The Binary Build Stage
12# This is a separate stage just for building the final binary.
13FROM base AS binary
14
15# ... copy source code and run the build command ...
16
17# Stage 4: The Production Stage
18# A clean, minimal image that only contains the final binary.
19FROM scratch AS production
20
21# ... copy the binary from the 'binary' stage and run it ...
Seamless VS Code Integration
VS Code’s Dev Containers make this incredibly easy. In your .devcontainer/devcontainer.json file, you simply add the "target" build argument to point to the stage you want to build.
1{
2  // ...
3  "build": {
4      "dockerfile": "../Dockerfile",
5      "target": "devcontainer"
6  }
7  // ... other devcontainer settings ...
8}
VS Code handles the rest! It will build and launch your container using the devcontainer stage, giving you a fully-equipped development environment.
Newsletter
Subscribe to our newsletter and stay updated.
Key Takeaways
- Single Source of Truth: A unified
Dockerfilefor all your environments, eliminating file duplication. - No More Drift: Ensures your development and production environments are always in sync.
- Streamlined Workflow: Simplify your CI/CD pipelines and developer onboarding by having a single, consistent build process.
- Leaner Images: The
--targetoption allows you to produce an incredibly small production image without needing a separate Dockerfile.
This powerful technique is a complete game-changer for managing your project’s Docker environment.
If you’ve ever wished for a simpler, more robust way to manage your containers, this is it.
Want a detailed guide for your specific programming language? Let me know in the comments or contact me here if you’d like me to write a walkthrough tailored to your stack.
If you’re looking to hire me to set this up for your project, feel free to reach out via the contact form as well—I’d be happy to help.
