The 1ms Lie: Why sleep() Breaks Real-Time Code—Resolution & Jitter Fixed
- October 13, 2025
- 9 min read
- Programming concepts , Operating systems , Rust programming , Python programming
Table of Contents
If you’ve ever built a real-time system, a data simulator, or a game loop, you’ve tried using sleep() to control timing.
And if you’re like most developers, it failed you.
You might be asking: “Why does my code with a 1ms delay run perfectly on Linux but drag to a 15ms crawl on Windows?”
The answer is simple, subtle, and crucial for reliable code: The operating system’s timer resolution is secretly limiting your precision.
The 1ms Surprise: Why Your Code is 15x Slower
A developer needed a simple data emitter to send out 1,000 records per second—one record every 1ms. The Python code was straightforward:
1import time
2
3# Goal: 1 record every 1ms
4delay_s = 0.001
5
6for i in range(1000):
7    send_data_record()
8    time.sleep(delay_s)
Result on Linux: Success! The script ran at roughly 1,000 records per second.
Result on Windows: Disaster. The exact same script plummeted to just 65–70 records per second.
The code wasn’t the problem. The operating system was lying about how long it would sleep.
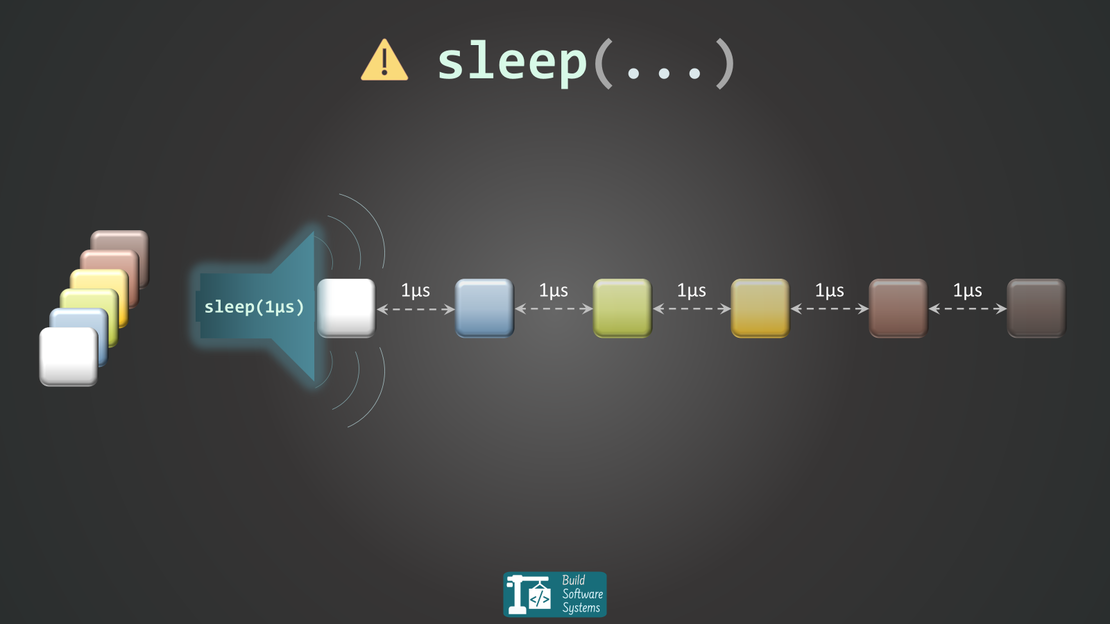
The Root Cause: Not All sleep()s Are Created Equal
The resolution of your sleep() call is capped by the underlying OS timer. Even if you ask for 1 microsecond, the OS may only be able to wake you up on its own coarse clock tick.
This distinction is critical for cross-platform reliability.
Windows vs. Linux Timer Resolution
| OS | Default Timer Resolution | Why It Matters |
|---|---|---|
| Linux | Often 1ms or better (down to microseconds with high-res timers) | When you ask for 1ms of sleep, the Linux kernel is highly reliable at honoring it. |
| Windows | Default is ~15.6ms | This coarse value is a power-saving default. Your 1ms request is typically rounded up to the next 15.6ms interval. |
This coarse 15.6ms default on Windows is what made the Python script run a staggering 15 times slower. The operating system fundamentally limited the application’s timing.
Tip
While Windows allows applications to manually request a higher 1ms resolution (via timeBeginPeriod), this is a system-wide change that increases CPU usage and power consumption for all or many running applications.
Avoid this manual workaround.
The Hidden Cost of sleep(): Inconsistent Intervals
Even with a high-resolution timer (like on Linux), a simple sleep() is still a bad practice for predictable loops.
When you call sleep(), you’re telling the OS, “My thread is done, put me to sleep”.
The OS scheduler guarantees you’ll sleep for at least that duration, but it can’t promise you’ll wake up at the exact moment requested. This leads to jitter.
The core bug for high-frequency systems lies here:
Bad Pattern: Fixed Sleep After Work
1loop {
2    obtain_data();  // (Takes a variable amount of time)
3    submit_data();
4    thread::sleep(Duration::from_millis(1)); // <--- The trap
5}
Why it’s a bug: The total time of one loop iteration is (processing time) + (sleep duration).
Your interval will always be longer than expected, and if the processing time varies, the interval will be hopelessly inconsistent. Your target rate slowly drifts over time.
Better Pattern: Measure Time and Adjust
The fix is to always account for the time spent doing work. You must calculate the remaining time and only sleep for that adjusted duration.
 1use std::time::{Duration, Instant};
 2
 3let target = Duration::from_millis(1);
 4
 5loop {
 6    let start = Instant::now();
 7    obtain_data();
 8    submit_data(); // The work is done
 9
10    let elapsed = start.elapsed();
11
12    // Only sleep for the time remaining to hit the 1ms target
13    if elapsed < target {
14        thread::sleep(target - elapsed);
15    }
16}
This pattern guarantees a consistent loop duration, making your system predictable.
Newsletter
Subscribe to our newsletter and stay updated.
Solutions That Actually Work
Stop using simple, naïve sleep() calls. For predictable, low-latency, and high-frequency code, choose one of these reliable strategies.
1. The Gold Standard: Interval Timers
Modern asynchronous runtimes are built to solve this exact problem by managing scheduling and drift correction for you.
In Rust’s Tokio, for example, the tokio::time::interval utility is designed to compensate for drift and hit the target interval consistently.
1use tokio::time::{interval, Duration};
2
3let mut ticker = interval(Duration::from_micros(100)); // Set your interval
4
5loop {
6    ticker.tick().await; // Waits for the NEXT scheduled tick
7    send_next_item();     // Process exactly on time
8}
This is the recommended approach for 99% of high-frequency applications. The runtime handles the OS complexity.
2. The Nuclear Option: Busy Wait / Spin Loop ☢️
For applications where absolute, sub-microsecond precision is non-negotiable (think low-latency trading or embedded control systems), you can bypass the OS scheduler entirely with a spin loop.
1use std::time::{Duration, Instant};
2use std::hint;
3
4let target = Instant::now() + Duration::from_micros(10);
5while Instant::now() < target {
6    hint::spin_loop(); // Tries to optimize the loop for the CPU
7}
Warning
Use with extreme caution: This consumes 100% of a CPU core for the duration of the loop, burning power and competing with other tasks.
It should only be used for extremely short waits where every cycle matters.
3. The High-Throughput Workaround: Bulk Sending
If your 1ms resolution is a recurring bottleneck and you cannot switch to a better timing method, pivot your strategy: send a batch of items less frequently.
Instead of trying to send one item every ~1ms, send N items every ~16ms (the Windows default).
// Pseudocode
sleep(16ms);       // Fires every 16ms
send N_items;     // N is the number of items for that period
This reduces your reliance on high-resolution timers and smooths out your output over time, trading latency for stability.
Note
N should be chosen such that the expected total time for one cycle—the sleep time (16ms) plus the time used to send the N elements—matches the target time interval.
For example, to achieve 1ms average spacing, the total cycle time (sleep + send) for N items must equal N x 1ms.
Final Takeaways
Precision matters when you’re building time-sensitive code—and sleep() often isn’t up to the task.
The real fix isn’t finding a “better sleep” function; it’s understanding how the OS schedules your code.
Stop using simple
sleep()in loops. Implement the Measure Time and Adjust pattern.For asynchronous code, use runtime utilities like Tokio’s
intervalfor automatic drift correction..Always test your timing logic on all target operating systems. If it works on Linux, it may fail spectacularly on Windows.
Newsletter
Subscribe to our newsletter and stay updated.
Bonus: Python Proof of Concept
Run this simple script on both Linux and Windows to see the timer resolution difference firsthand.
It attempts to sleep for 1ms exactly 1,000 times, and the total execution time exposes the OS’s minimum sleep resolution.
 1import time
 2
 3def prove_sleep_resolution():
 4    total_sleeps = 1000
 5    sleep_duration_sec = 1 / 1000.0
 6
 7    start_time = time.time_ns()
 8
 9    for _ in range(total_sleeps):
10        time.sleep(sleep_duration_sec)
11
12    end_time = time.time_ns()
13
14    total_execution_time_ms = (end_time - start_time) / 1_000_000
15
16    print(f"Actual measured execution time: {total_execution_time_ms:.2f} ms")
17
18if __name__ == "__main__":
19    prove_sleep_resolution()
Typical Results:
| OS | Result Time (ms) | Indicated Resolution |
|---|---|---|
| Linux | ~1150 ms | High (~1ms), close to the expected 1000ms. |
| Windows | ~14100 ms | Low (~15ms), roughly 14 times the expected 1000ms. |
Annex: The Kernel Deep Dive—How sleep() Actually Works
For those interested in the low-level mechanics, the behavior of a high-level sleep() call is entirely dictated by the operating system’s scheduler and timer mechanisms.
When you call time.sleep(duration) in a language like Python or Rust, the language runtime executes a low-level system call to the OS kernel. Here’s what happens differently on each major platform:
Linux: High-Resolution Timers (But Still Jitter)
On Linux, the standard time.sleep() call often translates to the nanosleep() system call.
Resolution:
nanosleep()can theoretically request nanosecond-level precision if the kernel and hardware support High-Resolution Timers.The Jitter Factor: The OS scheduler’s minimum scheduling quantum can still prevent a process from waking up exactly at the requested time, leading to jitter.
Modern Alternatives: High-precision timer mechanisms like
timerfdare often used by libraries to achieve more reliable timing by integrating with I/O multiplexing concepts likeselect()andpoll()but with better performance.
Windows: The Coarse Timer Default
On Windows, the standard time.sleep() relies on the system’s coarse-grained timer.
The Power-Efficiency Default: The default clock resolution is typically ~15.6ms. This coarse timer is maintained primarily for power efficiency, allowing the CPU to enter deeper sleep states more often.
A Manual Exception: While applications can manually request a system-wide reduction in timer latency (e.g., to 1ms), the default behavior is the low-resolution setting, which is why cross-platform code fails without explicit, platform-specific workarounds.
Newsletter
Subscribe to our newsletter and stay updated.